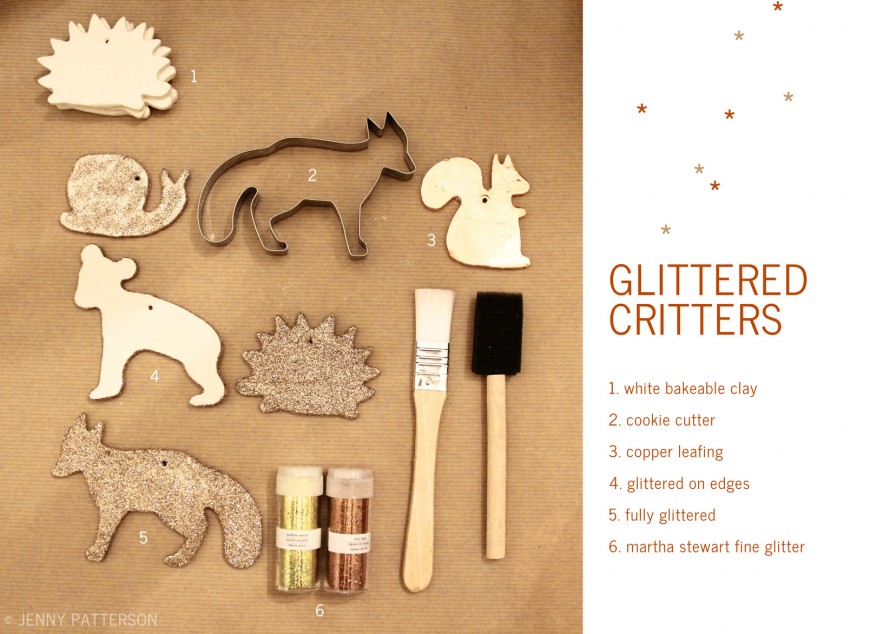
Every year I make most of my christmas gifts – this year I decided that I would make some smaller more manageable projects so each of my friends and family would be able to receive something… Behold the Glittered Critters Ornaments.
I’m not sure if all families have this tradition – but in my family we try to make most of the gifts we give one another. There’s usually one monster project that took forever to finish so you need to mark it as such. These glittered animals will serve as a cool marker and later be placed on the tree! The project is pretty easy – and very forgiving for the less craft savvy.
Supplies:
1 package of bakeable white clay, I used Sculpey
Rolling pin or something to rollout your clay evenly
A few cute small cookie cutters
White Craft Glue, I used PVA glue however anything that doesn’t yellow as it ages would work
Glitter
String
Plastic wrap
aluminum foil
oven (for baking the clay)
A general warning before I begin – Bake-clay is usually not food safe so make sure to clean your tools throughly after use.
Start by cutting a piece of plastic wrap that covers the general area that you will be rolling the clay on. I find that this helps with clean-up and aids in picking the shapes up after they are cut out. Take a wad of clay from the package – rolling smaller amounts of clay is advised – this clay is HARD!! Once you have your clay rolled out to about a 1/4 inch thick, cut your shapes out with your cookie cutters – it’s exactly like making sugar cookies! After you have your shapes cut pull the extra clay surrounding the shapes away and save it for another project. Next peel your shapes from the plastic wrap clean/smooth the edges and poke a hole at the top of the ornament – this will be used to hang the ornament after it’s baked. It’s really up to you how smooth you like the clay – since most of my ornaments were getting covered with gillter, I didn’t spend a ton of time worrying about small imperfections. Place your shapes onto some aluminum foil and bake your clay based on the instructions it came with. Once cooled “paint” the shapes with glue and sprinkle with glitter! Once completely dry shake or lightly brush off the excess glitter. Pass a piece of string or ribbon through the hole in the ornament and you’re done!
I did a few variations to my ornaments – some are copper leafed and others only have glitter on their edges. This project is super versatile – I hope this inspires some variations of your own.
